

Rather than hiding in the bushes to relieve myself, I like to use an outhouse for more privacy. Building an outhouse is a lot more convenient than looking for a bathroom each time you’re on the open field. Moreso, you must know how to build an outhouse with a flushing toilet so that you save the cost of hiring someone else.
You might need to prepare plenty of materials when making a DIY outhouse in the backyard. Here are the complete instructions on how to make an outhouse with a flushing toilet.
Table of Contents
Step-by-Step to Build an Outhouse With a Flushing Toilet
What to Prepare
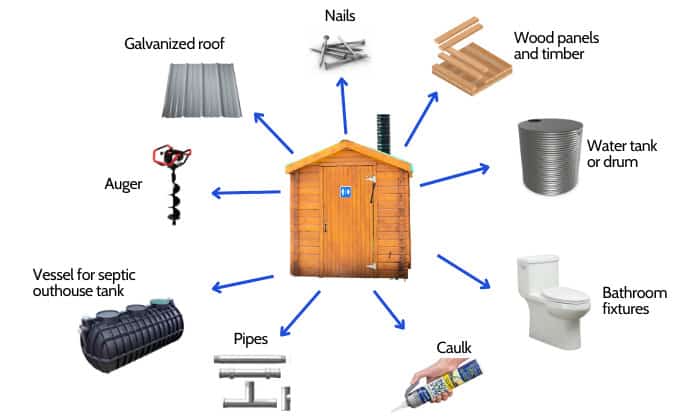
- Wood panels and timber, preferably cedar or pine to resist moisture and decay
- Water tank or drum
- Bathroom fixtures (e.g., sink, toilet, etc.)
- Vessel for septic outhouse tank
- Auger
- Caulk
- Pipes
- Nails
- Galvanized roof
Step 1: Prepare To Build An Outhouse Toilet
The first step in making an outhouse is to make plans. Do you want a modern outhouse design or a simple, sustainable outhouse?
Regardless of what design you choose, make sure that the design and construction
follow the rules for building an outhouse.
- Secure a permit from your local area. Building without a permit means you may be forced to remove it later on.
- Have your septic system evaluated to determine whether it can add an extra bathroom. If not, have the septic system upgraded or install another one.
- The distance of the outhouse should be no more than 75 feet away from your house or any residential building.
- The location of the outhouse shouldn’t be near springs and other domestic water supply sources to prevent contamination. It should be a little elevated to prevent the groundwater from falling into the pit.
Once you’re certain where to put a flushing toilet in an outhouse, you can gather the required tools and materials.
Step 2: Make A Hole
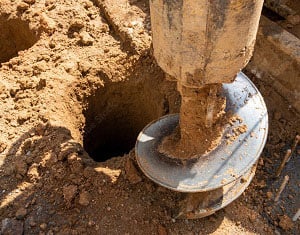
Once you’ve chosen a spot, it’s time to dig and make the toilet pit. This is where all the waste is collected.
Get an auger and dig a hole for your toilet pit. You can do this with a shovel, but it will take more time.
Dig as deep as possible so it won’t get full immediately. Generally, outhouse pits are 3–6 feet deep and 3–4 feet wide to fill up for several years of occasional use. If you use a septic tank, ensure the hole fits the vessel.
Another critical aspect to keep in mind is that the hole should be at least 3 feet above the local water table. Failure to comply with this rule may flood the outhouse and contaminate the water table.
Step 3: Install The Septic Tank
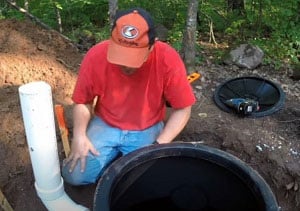
For this project, we’ll be using a one bathroom septic system instead of a composting toilet. This means no more moving the toilet.
- First, level the hole’s ground with some gravel.
- Insert the vessel into the hole.
- Make sure the tank is level by using a spirit level.
- Pack the sides with gravel to prevent the groundwater from falling into the tank’s sides.
- Vent the tank out. Insert a pipe 90 degrees up into the side. The pipe will keep the bad odor out of the outhouse.
- Seal the pipe with caulk so no drainage water comes out of the tank.
- Level the ground so you can move on to the next step.
Step 4: Create A Strong Base
Next, you’ll need to make a strong base on top. It could be a concrete slab or a wooden box. Make sure that the base is slightly bigger than the hole so the toilet structure won’t collapse.
For example, you have a 3’x3’ hole. The wooden base should be around 4.5’x4.5’ big.
Make a hole at the center of the base leading to the pit. It should be no more than 10 inches wide to prevent kids from falling into the hole.
Step 5: Build The Floor
Now, we’ll do the flooring of the outhouse. You can choose wood or steel floor frames, depending on the quality of the ground.
Wood is preferred for stony ground, while steel or concrete is recommended for muddy ground as they don’t get degraded with moisture.
1. Cut pieces of timber to make the frame. The length depends on the size of your outhouse. You should have enough room for the sink, cabinets, and other bathroom fixtures.
Don’t forget to keep in mind the minimum clearance between each fixture, as required by building codes.
2. Align the wood, timber, or steel beams into the floor. You can form a square or add more pieces in between to further strengthen the frame.
3. Nail the plywood sheets into the frame, or you can pour cement to make a concrete floor. Make sure that you don’t cover the toilet base and the ventilation pipe.
- TIP: Treat the timber with water resistance to fight decay.
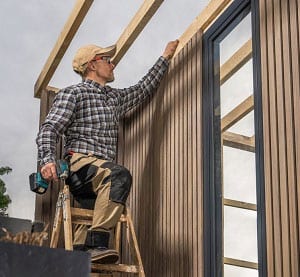
Step 6: Construct The Walls

Before you build the walls, plan out where the door and windows are located. The door should be opened easily without anything blocking its way.
- Stand and nail a 6”x6” wooden pole at each corner to make the wall frame.
- Put horizontal timber on each side on top. Put more nails in every corner to make the structure sturdy.
- Add more timbers on each side of the wall frame. You can also add a diagonal brace to reinforce the structure.
- Make a frame for the door and windows.
- Next, nail the wood panels into the frame to build the wall, leaving space for the door and windows.
Step 7: Install The Roof
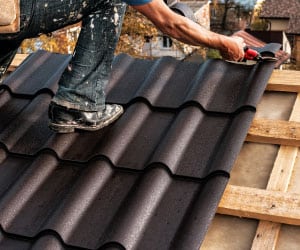
Once the wall is up, it’s time to build the roof. First, you need to make the frame and then install your preferred roof material. Roll roofing and corrugated sheets are popular because they’re easy to install.
- Make the rafters and nail them on top of the outhouse.
- Next, lay the roof on top of the rafters, then nail them into place. If you use roll roofing, overlap them before nailing. Corrugated sheets should be nailed facing down.
- Remember the ventilation tube near the toilet seat? Extend the pipe with another pipe to reach through the roof. You can put a cap on the vent pipe above the roof to prevent the vermin and bugs from going inside the outhouse.
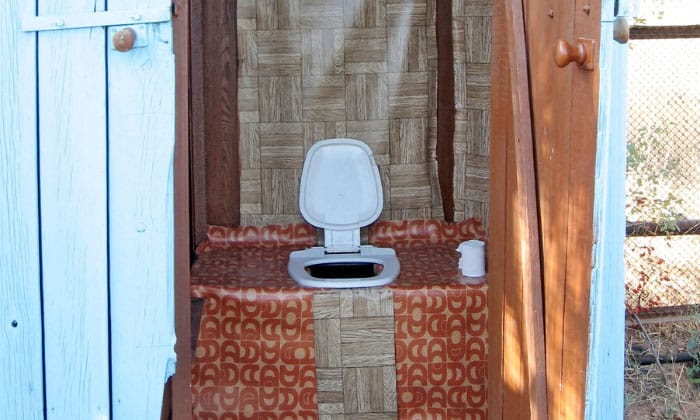
Step 8: Fit In The Toilet
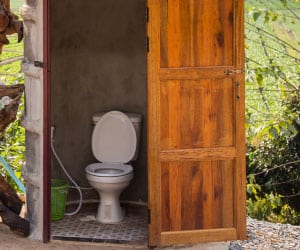
Now that the outhouse structure is almost ready, it’s time to connect the toilet to septic tank plumbing. You should decide what type of toilet to install.
If your outhouse is in a cold climate, use a porcelain or ceramic toilet because they don’t get damaged by high temperatures.
- Connect a PVC pipe to the toilet flange. The pipe will serve as the drain pipe, carrying the waste into the septic tank.
- Now, attach the toilet to the flange and seal the toilet with a wax ring.
- Assemble the rest of the toilet’s parts, including the cistern.
- Since the water line is difficult to install in this setup, you can flush a toilet with external water. Keep a drum of water beside the toilet or install a rainwater tank, in which case you’ll need to connect the toilet to the water supply.
Watch this video on how to install a rainwater tank in the outhouse.
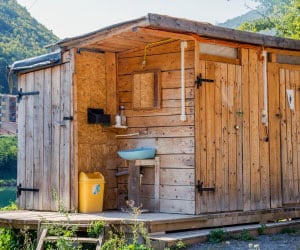
Step 9: Adorn The Outhouse
You can’t just put a toilet in the outhouse. You may need to install more bathroom fixtures to make the outhouse more habitable.
- Install a sink to wash your hands after using the toilet. You can put a sink inside or outside the outhouse.
- You can put a tissue holder or a small cabinet under the stink to store supplies.
- Consider installing a solar light to illuminate the space during the night.
Step 10: Install The Door And Windows
To finish the outhouse construction, attach the door to the frame. You can purchase a door or make your own from scratch.
- Nail the flat wood panels vertically according to the frame.
- Apply a horizontal bar or diagonal bars for extra support.
- Attach a lock.
It’s optional to install a window, but ventilation is important for the comfort of using an outhouse. Casement windows are perfect for outhouses because they open outwards and close securely.
You can also use any window as long as you put a metal screen to keep the bugs away.
Tips to Dispose of Waste
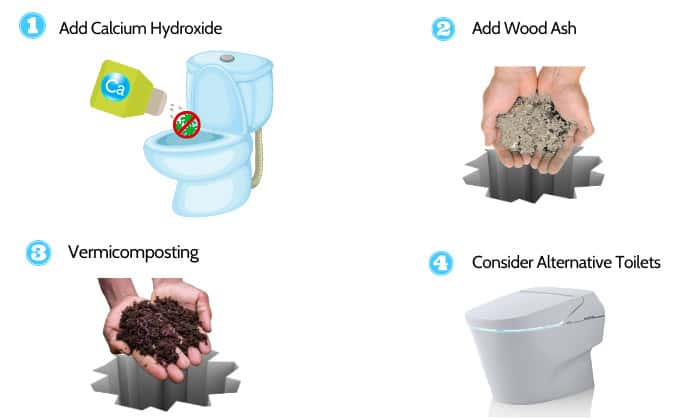
- Add Calcium Hydroxide: If you want to reduce the odor in your outhouse, drop calcium hydroxide straight into the bowl. The acidic content of the lime breaks down the odor and kills microorganisms.
- Add Wood Ash: To decompose the waste and reduce the contents of the pit, add some ash. Human waste decomposes when mixed with organic materials.
- Vermicomposting: Add worms inside a septic tank to turn sewage into a solid organic material. The wastewater that leaks from the organic material becomes cleaner as it filters the waste.
- Consider Alternative Toilets: If you can’t afford to build an outhouse, you can use environment-friendly products like Toilet Tech, which decomposes urine and feces separately.
Alternatively, a portable flush toilet is a lightweight method to bring a toilet to the backcountry.
FAQs
How much does it cost to build an outhouse?
The cost depends on the materials you’ll use. You can expect to spend around $100-$300 if you build a simple outhouse with cheaper and old materials. If you need to install a new toilet set and fixtures, then expect a higher cost of around $500 or up.
How long does an outhouse hole last?
A hole that’s five feet deep and three feet across can last about ten years for three users. Imagine if you’re alone—you’ll be using the toilet for several decades.
You can extend the life of the pit with proper care and maintenance.
Why do I need a permit to build an outhouse on my property?
You’ll need a permit before constructing an outhouse to help protect the nearby water sources and other natural resources in your area. The rules of obtaining the permit may vary from one area to another, but you need to follow the right disposal of sewage.
Conclusion
Now that you know how to build an outhouse with a flushing toilet, you can make a pit latrine without harming the environment. All you need is the right plumbing tools and materials. Follow the local regulations for building an outhouse so that you avoid any future problems.
If you have any experience with outhouses, let us know in the comment section below. Please share this article to spread more information online.

I’m Paulk Webb, and I work as a writer for Saveourwaterrebates. I’m happy to put in the time and effort to conduct market research to identify the most pressing issues faced by households concerning their plumbing. Feel free to check out our guides to get the most informed recommendations for how to solve your problems.