
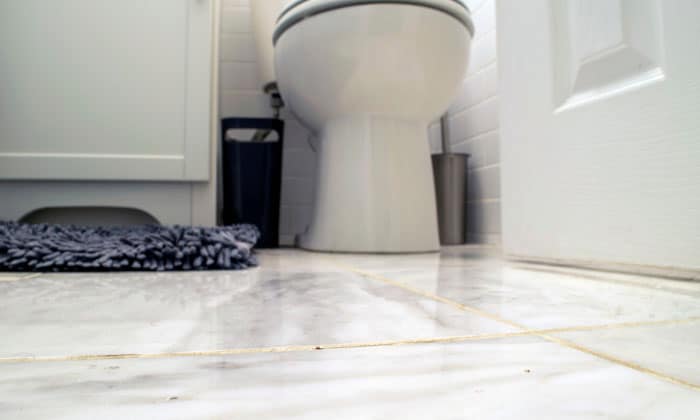
Having a new house and deciding to DIY most of your house’s parts seems exciting, but we must admit it is no piece of cake. For example, when it comes to the bathroom and the installation of the toilet, with all that tiling works around it that abate your willpower.
Suppose you have cut tiles around the toilet walls, now all that is left is the tiles around the toilet. Do you have the confidence to cut tiles without ruining them all? If you wonder how many ways to cut tile around a toilet, well, don’t worry; we’ve got you covered on this one!
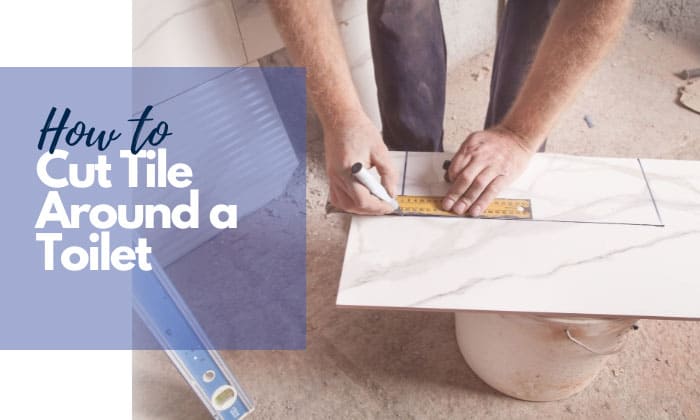
Follow our simple steps on how to cut tile around a toilet, and you’ll have the perfect tile hole served for your toilet in no time.
Table of Contents
What to Prepare
To tile a bathroom floor in general, you need these necessary tools as follow:
- Fine sandpaper
- Pencil/ Marker pen
- Tile scribe
- Tile snipper
- Angle grinder
- Constructing paper/ tracing paper
- Tile wet saw
- Angle tile cutter
- A tape measurer
- A set-square ruler
If you actually don’t need to cut tiles that frequently, you can prepare your tools without a wet saw.
Step-by-step to Cut Tile Around a Toilet
While tiling around a toilet, you can choose to tile it around the toilet base with curved-cutting tiles, or you can just make a hole that fits your toilet’s flange, depending on how your toilet is previously positioned. A proper way is to tile under the toilet, around the flange.
How to cut tile around the toilet flange?
Before you cut tiles, make sure that you have done tiling behind the toilet, and the rest of the room should be tiled and dry so that you could avoid damaging them in the process.
The toilet flange is where you must work, so you need to draw out the grid, and wet lay the tiles on the floor, but remember to avoid the space where you will make a hole for your flange later, and with that, you are ready to tile around the toilet waste pipe, or around the toilet flange.
Step 1: Trace the flange
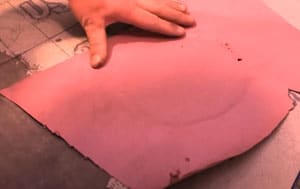
To make a round shape template around the flange, you could construct paper/ tracing paper manually or a modern form template tool that helps you draw a perfect circle on the tile.
Make sure your construction paper is the same size as the tile and put it on the flange, then press to emboss the rear of the toilet flange on the paper.
Next, use a marker pen to trace the curve, then cut a round shape resembling the position of the tile’s hole.
Step 2: Draw out the circle on the tile
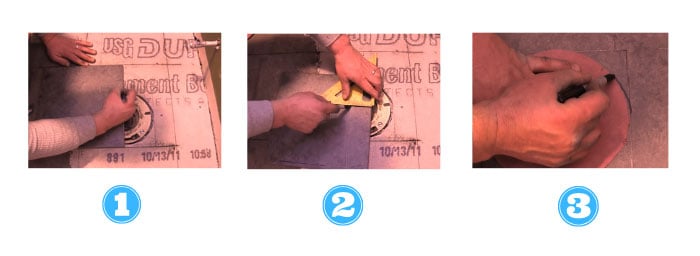
Now you need to see what position this paper circle would lie on the tile since you might not be able to change the tile’s position on the floor if you have tiled the rest of the bathroom.
Put the tile onto the flange and see if it fits, then slide it down in a vertical direction until you can see the flange and the tile’s rear meets the flange’s diameter.
Mark two points where the tile’s rear comes in contact with two tips of the flange’s diameter (the longest part of the flange).
When you’re done, repeat this step in a horizontal direction, and now you will have four marked points on the tiles. Use a set-square ruler to draw straight lines from those points; you will have a square shape on the tile.
Place the round shape you just cut on the square, and draw the circular line on the tile aligning with the circle paper.
Step 3: Make the cuts on the tile
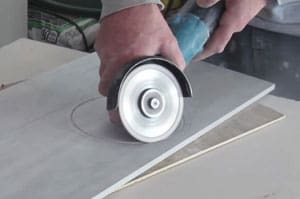
There are also two methods that you can opt for cutting tile around the toilet.
You can either use a tile scribe/ snipper or an angle grinder based on whether you cut tile around the toilet or around the flange.
If you need to cut tiles frequently, you can cut them with a wet saw for more convenience.
Cutting around the flange requires you to use an angle grinder, it would be easier for you when the tile nipper doesn’t work well as the flange is off the tile’s edge. Do the cutting while standing in a space where you can move around.
Make the blade at a 45-degree angle to the tile, and slowly grind the traced circle until you finish the circular line. Don’t forget your safety tools, like goggles, to avoid dust.
Step 4: Dry-fit the tiles
Now has come the time for you to wrap things up! But before you cut, peel, and stick the tiles around the toilet, dry fitting the tiles on the floor is an important step that you must not miss out on. You need to make sure the tile fits the position of the flange and the other tiles around it.
How to Cut Tile Around the Toilet Base?
If your toilet could not be removed by any means, you can cut tiles around the base without removing the toilet, starting with creating a template based on your toilet base’s curves. You would need a tape measurer and paper to trace the base and cut the template.
Use paper of the exact same size as the tile, and apply it on the toilet base to mark the line that comes into contact with your toilet base. For a more accurate result, cut a series of slits, apply it to measure, and draw the line again.
With a tile scribe, you might want to make a scratching line onto the tile, so it would be easier for you to cut more smoothly. Now, use a tile snipper and cut out small pieces of tiles slowly until it reaches the line you’ve created before. The last step for you to do is to use sandpaper to round off the tile’s edges.
After you settle the tiles on the floor, caulk or seal is needed to hide the grooves and so, it would be quite troublesome if you want to replace a new toilet. Therefore, it might be less convenient if we cut tile around the corners of the toilet base.
Frequently Asked Questions
Should you remove the toilet to cut the tile?
If your toilet cannot be removed for certain reasons, you can just tile around the toilet by cutting the tiles in curves to fit around the toilet base. However, we recommend you cut tile around a toilet flange, after the toilet has been removed, as it is a more proper way to tile and reduce the amount of work to do.
Obviously, you need to cut more curves, and you might ruin more tiles. Moreover, in the case when you want to replace your toilet, it would not hassle you to find a specific type of toilet to fit the shape of the tiles, since toilets might come in different sizes and designs.
Caulk or grout applied to the toilet base after tiling also prevents you from removing the toilet easily in the future, though it will provide a neater look for your toilet base.
Do you tile around a toilet or under it?
You can either tile around the toilet, or under it as we have mentioned above.
It would be better to tile under the toilet, and around the flange so that less work is required. Furthermore, in case you replace your toilet with different sizes and base shapes, it would be troublesome if the tiles around the toilet base do not fit and you also have to deal with caulk upon removing the toilet.
Tiling around the toilet or under it might also depend on the type of tiles, due to their difference in thickness. If your bathroom tiles are ceramic, it would be more proper to tile under the toilet. Meanwhile, if you cut vinyl tiles around the toilet, it is best to place them under the toilet.
Ceramic is a stronger and thicker material, so ceramic tiles can withstand the weight of the toilet. Whereas, vinyl tiles might get peeled off because of the toilet’s weight and fail to work effectively.
Conclusion
These are two common ways on how to cut tile around a toilet. One is to cut around the toilet flange, the other way is to cut tile around the toilet base. It would depend on the type of tiles, or how removable your toilet is.
It would be an interesting and rewarding experience to DIY your house and do all the tiling work, but it is unavoidable that you may ruin tiles in the process, so buy some more extra tiles for backup.
Be careful while working, and follow the steps while making sure there is no issue left unchecked, and you will get a perfectly cut tile for your toilet in no time!

I’m Paulk Webb, and I work as a writer for Saveourwaterrebates. I’m happy to put in the time and effort to conduct market research to identify the most pressing issues faced by households concerning their plumbing. Feel free to check out our guides to get the most informed recommendations for how to solve your problems.