
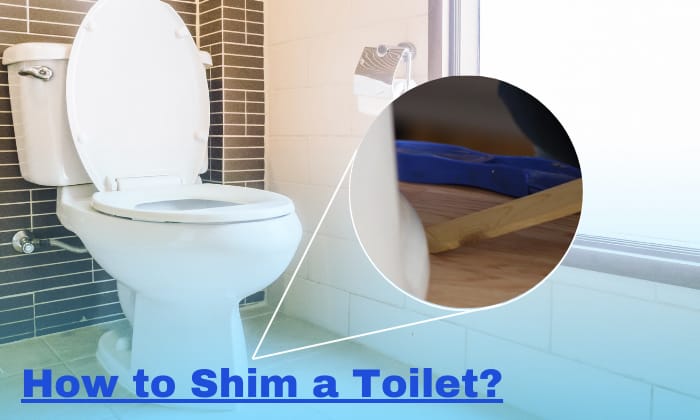
A shaky toilet is not an uncommon problem. The issue may arise when the toilet’s underside is not level against the floor, frequently caused by the parts that attach it to the drain pipe.
However, do not worry. This article will teach you how to shim a toilet to address this issue. To shim a toilet, you need to look for its gap first. Read on to know the detailed steps as you fix the problem in no time.
Table of Contents
What You Need to Prepare for This Diy Task
Shimming a toilet helps stabilize it from wobbling; here’re the materials you need to gather:
- Shims (make sure to use the right size and materials, either wood, rubber or plastic pieces)
- Scissors or a knife that can cut the shims
- Mallet or hammer
- Caulk gun (100% silicone caulk tube recommended)
- Masking tapes
- Cleaner and rags
- Rubber gloves
Please note that these steps are for toilet rocking, yet not leaking. If there is leaking water around your toilet base, shimming it does not help much, as you need to replace the wax ring first.
Steps to Shim Your Toilet
Step 1: Clean the base
Use the available cleaner and a rag to quickly remove the dirt around your toilet base. Use a small brush if you see too much built-up dirt around the base. It makes finding the gaps that cause rocking the toilet easier.
Step 2: Search the gap
Now that the base is clean, you can start searching for the small holes/gaps that make your toilet rock.
If finding the shimming location proves challenging, another option is to slide a toilet wedge underneath the base to determine how far the shim needs to go.
You can indeed shim a toilet flange. A flange that sticks out significantly from the ground, in addition to the toilet’s uneven placement, makes the toilet rock.
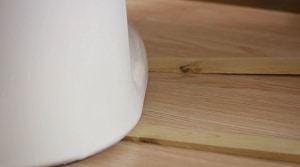
Step 3: Install the toilet shims
Depending on the number of holes/gaps, we often need one or two pieces of shims to level a toilet on an uneven floor. For your information, each piece measures 1.5 inches wide and 7.5 – 9 inches long. So, pick enough pieces to fill the gaps.
Now, insert the first shim in, sharp edge going in first. Push the sharp head further. Secure the shim in place using your mallet/hammer. Make sure the raised/tail part of the shim aligns with the baseline to stabilize the toilet.
So the same with the other shims if you need to cover more gaps.
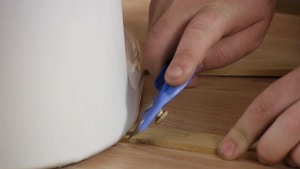
Step 4: Tidy up the shims
After properly placing the toilet bowl shims, you need to tailor and cover them to ensure they match well with the toilet base and do not become an ugly sight.
Now, cut toilet shims’ protruding ends with the knife to make your setup look tidy. Cut alongside the toilet base, and do not use too much force to avoid leaving scratches on the toilet floor.
Step 5: Check if the shims effectively stabilize the toilet
Checking for any leakage in the toilet by flushing your toilet several times. Then, make sure that the toilet is stable and comfortable to use. If the toilet is stable, but the seat is not, then the problem lies in your toilet seat. In that case, consider buying a toilet stabilizer.
Step 6: Applying caulk
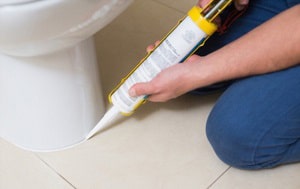
Applying caulk is necessary to secure the shims and the toilet base to the floor and avoid bad smells. Caulk also aids in making the shims unnoticeable.
- Put on your rubber gloves
- Cover the base and the floor with masking tapes
- Fill the gaps between the shims, the base, and the floor with caulk, using the caulk gun
- Push the caulk in using your gloved thumb
- Wait for some minutes for the caulk to dry
- Take off the masking tapes
They are not the most flexible type, however, because it is difficult to utilize them for big gaps because they are difficult to stick together using glue.
Types of Shims
Trims come in various lengths and materials, thus ideal for fixing a rocking toilet or issues caused by setting a toilet on an uneven floor. Here’re some types of shims to consider using your task:
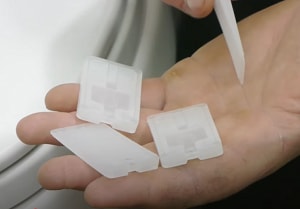
- Plastic trims
Plastic shims for toilets may be more dependable than rubber shims regarding their materials. Due to the hybrid recycled composition, these durable pieces can be of long-term use. To meet your specific needs, you can choose hard or soft plastics with varying degrees of toughness.
They are not the most flexible type, however, because it is difficult to utilize them for big gaps because they are difficult to stick together using glue.
- Rubber shims
Toilet tank rubber shims are thquite affordable and the best choice if you’re seeking shims that can be stacked using adhesives.
They are made of rubber that withstands elements well. Rubber shims are also commonly used since they avoid harming the floor.
- Nylon shims
Toilet leveling shims made of nylon are versatile in use, especially in leveling household appliances. The shims’ ribbed design provides greater stability for your toilet, fixing the rocking issues well.
They are simple to handle and can be stacked using adhesives. Also, it is easy to tailor their sizes to fit the gaps.
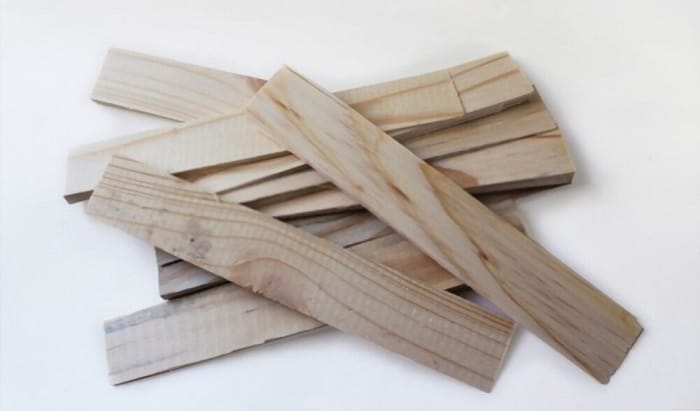
- Wood shims
Wood shims are easy to use and stack together to fill the base holes without slopping. However, with exposure to water, in case of a leaking toilet, they can be damaged sooner than expected.
Helpful tips/FAQs

Is shimming the toilet bad?
It is worse if you let the toilet wobble, so shimming the toilet is indeed beneficial. The bowl will stop swiveling if you use toilet shims.
Why it’s bad to let your toilet wobble?
Leaving your toilet to wobble can permanently ruin your toilet floor with the scratches and dents it causes on tile.
Aside from that, you’ll have an ideal breeding ground for bacteria beneath the toilet, potentially harming your family’s health.
Furthermore, if you let the wobbly base to the point where it leaks, the stench of the leaky toilet will be really unpleasant.
Should you caulk around the toilet?
You should, indeed, caulk around the toilet. A toilet that has been caulked is easy to clean and prevents odors from escaping. There will be a gap between the shimmed bathroom and the floor if it is not caulked. That particular location will always be tough to clean.
How to make DIY toilet shims?
If you cannot find suitable toilet shim sizes, you can level your toilet with other alternatives. Washers and coins are two good choices. Level the toilet with as many coins or washers as necessary, then caulk the floor as usual.
How much can you shim a toilet?
If you want to do it yourself and are confident in your abilities, you can get repair materials that can cost you around $15. If you want to hire a professional, you need to budget at least $30.
Conclusion
Shims come in a wide range of alternatives, and the best type will depend on the toilet you’re using them on. Buying a quality toilet wedge can help you a lot, like toilet shims Lowe’s. Be sure to take into account your budget.
Now that you know how to shim a toilet, you’ll be able to alleviate the agonizing feeling you have when you use the toilet. However, if the problem persists, consider calling a professional plumber.

I’m Paulk Webb, and I work as a writer for Saveourwaterrebates. I’m happy to put in the time and effort to conduct market research to identify the most pressing issues faced by households concerning their plumbing. Feel free to check out our guides to get the most informed recommendations for how to solve your problems.