

Does your toilet run constantly or flush slowly? Most of your toilet flushing problems are solvable with a simple adjustment of your fill valve. Learning how to adjust a toilet fill valve allows you to control the amount of water that goes into the tank.
You don’t want to refill the tank too much, or the water will overflow. Having too little water inside the tank can also result in poor flushing power. The ideal is to have the liquid level reach the desired fill line.
Continue reading to learn how to tune your toilet fill valve for optimum performance.
Table of Contents
Steps to Adjust Toilet Fill Valves
Tuning a toilet fill valve is easy if you know what its type is beforehand. You can either turn the screw clockwise/counterclockwise, bend the float arm, or squeeze a metal clip. Learn the different ways of adjusting a fill valve below.
Step 1: Check The Water Height
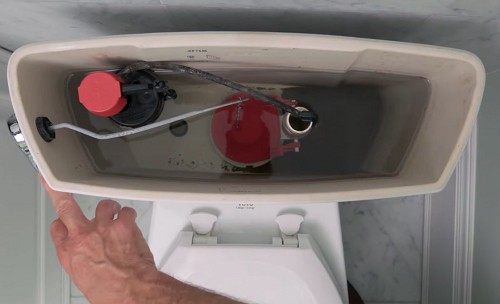
To execute proper adjustment, check the water height in your water tank.
- Look for the water level line indicator and see whether the liquid reaches that line, which is usually an inch below the top of the overflow tube. If the water goes above the line, then you’ll need to reduce the water level.
- What if your toilet has no line indicator? Check the tank’s walls for any water stains, because these indicate where the liquid usually sits. You’ll need to raise or reduce the amount of water input so that it stays an inch below the overflow tube.
Tip: Put a colored tape to mark the area where you want the water level height to reach.
Step 2: Empty The Tank
You’ll need to empty the tank so that you can apply the right toilet fill valve fix without any obstructions.
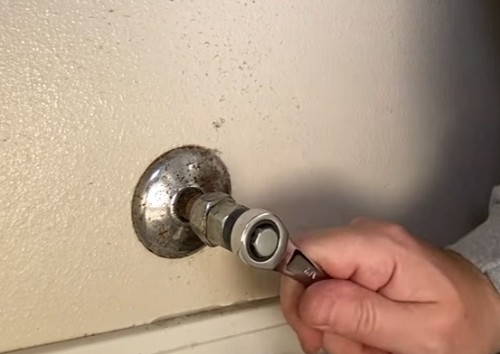
- Locate your water shut-off valve and turn it counterclockwise to stop the water from going into the tank. You can find this valve at the base of the toilet.
- Make a final flush to drain all the water out.
- If there’s some water remaining, absorb it with a sponge or thick cloth.
Step 3: Identify The Type Of Toilet Fill Valve

Adjusting your toilet fill valve depends on what type it is. Here are the different toilet fill valve types of today.
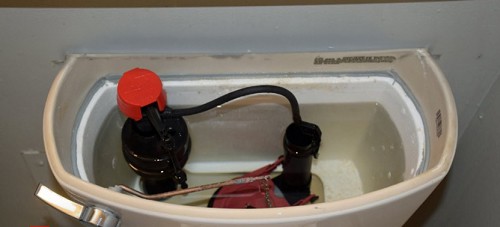
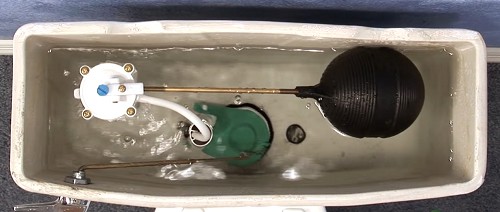
- Ballcock Fill Valve
This type features a float ball attached to a metal arm. It can come in two styles: plunger and diaphragm. The old plunger-style model uses a plunger mechanism to control water flow, while the diaphragm style utilizes an elastic diaphragm casing.
- Float Cup Valve
If you have a new toilet, then your tank is probably fitted with a float cup style. This fill valve has a cylindrical cup that moves up and down on a fill tube, providing more reliability than their ball counterparts.
- Internal Fill Valve
If you find a large plastic top with a cylindrical base, then you probably have the internal fill valve style. The float is the part that controls the tank’s water level and is a variation of the float cup type with a smaller footprint.
- Floatless Valve
Instead of a float, the floatless type uses a pressure-assisted mechanism to adjust toilet water level.
Once you’ve identified the type of fill valve in your tank, you can adjust a toilet fill valve flush valve accordingly.
Step 4: Follow The Steps for Your Fill Valve
4.1. Adjusting Ball-Style Valves
If you have the plunger-style or diaphragm-style fill valves, you can twist the screw or bend the float arm to adjust the water level properly.
- Look for the adjustment screw on the fill valve.
- Grab a flathead screwdriver and twist the screw anticlockwise to reduce the water level or clockwise to increase the water level.
- If there’s no screw, reach for the float arm and carefully bend it upwards to increase the water level or downwards to bring about the opposite effect.
TIP: Never bend a plastic float arm because it will only break it.
4.2. Adjusting Float Cup Fill Valves

Adjusting a float cup style is easy. All you need is to turn the screw clockwise or counterclockwise.
- If overflowing is one of your toilet fill valve problems, turn the screw clockwise to lower the cup and shut the water flow sooner.
- If the water level needs a raise, turn the screw counterclockwise to raise the float cup.
- For float cups connected with a metal clip, squeeze the clip and move the float up to increase the water level. Move the float down to prevent overflow and reduce the water level.
4.3. Adjusting Internal Fill Valves
Tuning an internal fill valve is a bit tricky because the float hides inside the head. Although the float works similarly to a float cup style, the movements remain hidden from view.
- Using your hand, twist the valve head counterclockwise.
- Move the head up to increase the water level or down to lower the water level.
- Once you think that the placement of the head is in the right location, twist the head clockwise to secure it.
4.4. Adjusting Floatless Fill Valves

You’ll need more grit when adjusting the new floatless fill valve design. Unlike other valves, the screw is located at the bottom of the tank.
- Find the screw for adjustment and check whether you can turn it by hand. If not, grab a screwdriver.
- Twist the screw clockwise to increase the cutoff pressure setting. This will increase the water level inside the tank.
- Turn the screw counterclockwise to shorten the cutoff pressure setting and reduce the water level.
Step 5: Refill To See The Water Level
Once you’re done with the adjustments, return the water supply. Turn the water shut-off valve clockwise to fill the tank. Look at the water level closely.
If the water reaches the desired height, which is just right below the overflow tube, you can stop the adjustments.
Reinstall the tank lid and you’re good to go. If not, repeat the same adjustment process until the water level reaches the desired height.
Conclusion
Now that you know how to adjust a toilet fill valve, you can save the cost of calling a plumber immediately. All you need is to determine your type of fill valve and apply the right steps.
The general rule is to have the water level an inch below the tip of the overflow tube.
Let us know your experiences with toilet fill valves in the comment section below. If you like this tutorial, please share it with your friends.

I’m Paulk Webb, and I work as a writer for Saveourwaterrebates. I’m happy to put in the time and effort to conduct market research to identify the most pressing issues faced by households concerning their plumbing. Feel free to check out our guides to get the most informed recommendations for how to solve your problems.