
Is a compost toilet worth the hype?
A composting toilet lets you turn your waste into valuable compost, helping plants grow and conserving water, all while being easy to make and use.
Today, DIY composting toilets are used in off-grid living situations, rural areas, recreational vehicles (RV), sustainable initiatives, and temporary events or construction sites.
If you’re into one of these settings or you want to try no-plumbing toilets, learning how to make a DIY composting toilet is a good idea.
No need to worry because building a DIY composting toilet can be simpler than you think.
Table of Contents
Building Your Own Diy Composting Toilet: a Step-by-step Process
The easiest way to build a compost toilet is by using the right tools. It’s ultimately better to have materials and tools in your home, but you can buy a high-quality DIY composting toilet kit.
What to Prepare
Materials
- Plywood sheets (box and lid)
- Wood planks (legs)
- Paint (optional)
- Toilet seat with hardware
- Urine diverter (optional)
- Small wheels (optional)
- Silicone caulk
- Buckets
- Absorbent materials
Tools
- Measuring and marking tools
- Saw
- Pocket hole jig
- Screws, hinges
- Drill
- Woodworking file
Building your composting toilet is easier than you might think. You can quickly assemble a system that fits your needs with simple instructions.
Are you ready? Follow these simple steps to make a DIY composting toilet.
Step 1: Build the Box

- Determine the dimensions of the box.
- Measure the available space in your plan to place your toilet. Consider the design and size of the toilet seat, bucket, urine diverter, or any other features you want to include and the ideal toilet height.
- Using the measured dimensions, you may create a diagram or model of your composting toilet.
- Cut 6 pieces of plywood using a saw according to the dimensions you calculated.
- To assemble your wooden composting toilet box, align the plywood pieces to form the box shape. Use a pocket hole jig to create hidden screw holes. Use the screws to attach the sides to the bottom portion and repeat the process for the remaining sides.
Step 2: Cut the Hole

Use the toilet seat to trace the area you need to cut. Position the toilet seat, with the lid open, atop the plywood where you want the hole to be.
Drill a hole along the traced line to affix the jigsaw blade. Proceed to cut along the traced line, following the circular shape.
Pro tip: You can paint or varnish your wooden box for a more polished look. It will also help protect it from moisture, humidity, and potential damage.
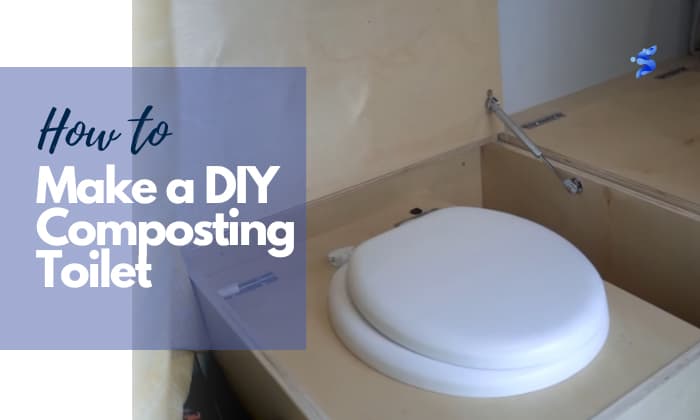
Step 3: Install the Toilet Seat

Place the toilet seat assembly atop the hole you’ve cut in the plywood box. Ensure that it is properly aligned and centered over the hole.
Use a pencil to mark the seat mounting points on the top of the toilet box to identify where the hinges will be attached.
With a drill, create holes at the marked locations. The size of the holes should match the hardware provided with the toilet seat.
Install the seat hardware. Adjust it as needed to match the dimensions of your homemade toilet.
Step 4: Add Urine Separator (Optional)

If you have purchased a plastic urine diverter, it is designed to sit upright inside your composting toilet. However, you can also create your DIY to match your off-grid toilet.
Place the urine separator underneath the plywood lid, aligning it with the front edge.
Use screws to firmly attach the urine separator to the plywood lid, ensuring stability.
Check if it is aligned with the hole in the lid to ensure urine goes into the separator and prevents any bypass while allowing solid waste to drop into the designated bucket below.
Step 5: Build Legs for the Box

To give your composting toilet stability, add legs by attaching the wood plank to the four corners of the wooden box.
You may add small wheels to the bottom of the plywood box for a portable composting toilet. Choose small, sturdy wheels that can support the weight of the composting toilet. Attach the wheels to the underside of the plywood box at each corner.
Step 6: Place the Bucket Inside

Get the correct size of buckets for your compostable toilet project.
Using a 5-gallon bucket for collecting solid waste is commonly recommended, while a long and narrow container for urine. You can always find out what size and shape of buckets fit.
You need several buckets in rotation to make sure you don’t run out when the first one is full.
Step 7: Attach the Lid

To attach the lid and ensure your simple composting toilet remains hidden and has no smell, follow these steps:
- Choose where to position the lid on top of the composting toilet box and mark the attachment points.
- Attach hinges to the lid and align them with the marked points on the box.
- Fasten the hinges to the box using screws, ensuring a tight fit.
- Open and close the lid to check for smooth movement.
Step 8: Add Absorbent
Before you try your compost toilet, add absorbent material. The best absorbent options for a compost toilet are carbon-rich materials that promote quick breakdown of solids.
With a bucket covered with absorbent material at the bottom, it forms a layer that will soak up excess moisture and help neutralize odors.
Remember to keep a supply of absorbent material on hand to cover the waste each time you use the toilet.
Frequently Asked Questions
Does a Compost Toilet Smell Bad?
Absolutely not! With the right materials and steps, you can make a composting toilet that is odor-free. In addition, by correctly using your compost toilet and ensuring enough absorbent material in the bucket, you won’t have to worry about any foul smells.
But you can install a ventilation system if you’re still in doubt.
Where Can I Safely Dispose of Waste from My Composting Toilet?
When you make your own composting toilet, don’t forget that the waste it generates is an organic material that requires proper disposal.
Composting toilet waste can be disposed of in designated dump stations, sewage treatment plants, or your garden or backyard as a nutrient-rich fertilizer for plants and trees. Another option is to add the waste to an established compost pile.
Conclusion
A composting toilet is a good solution for efficient, low-cost, and eco-friendly waste management.
Remember, there’s no shortage of creative options when making a composting toilet. It’s all about finding the method that speaks to you and matches your needs.
With these helpful steps on how to make a DIY composting toilet we provided just for you, get the suitable materials and tools, and you can get started.
Have fun creating your first DIY composting toilet!

Hello, my name is Freddie, and I am the founder of Saveourwaterrebates.com. I am inclined to launch this website in order to provide the best tips and guides for you to fix simple issues at home when access to a plumber is unavailable.
Over the course of my more than 15 years as a plumber, I’ve seen many families struggle with the simplest yet troublesome issues. It entails choosing the best appliances that will benefit them in the long run, as well as installing and maintaining toilet accessories and dealing with other sewage-related problems that arise.