
Is your toilet lever wobbly or stays down after flushing? Is it looking all worn-out and rusty? Or worse, is the toilet not flushing even when the lever is pushed?
If you experience any of these, you need a new toilet handle.
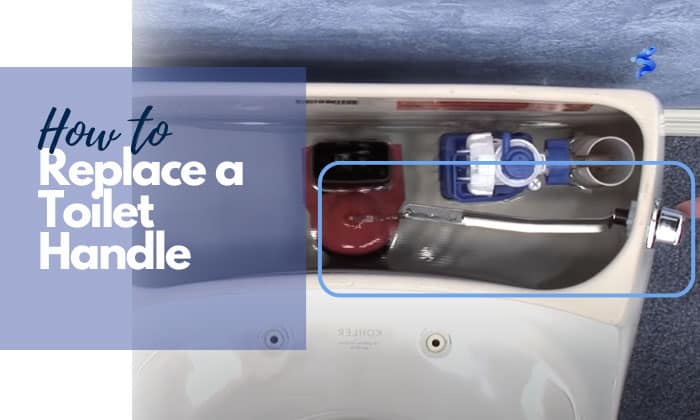
This article is all you need to teach you how to replace a toilet handle. From the materials you’ll need up to the step-by-step process, we covered it here. Plus, you’ll get other ideas, too, such as the cost of the new component.
Table of Contents
What is the Toilet Trip Lever?

Before we explain how to fix a toilet handle, we need to know how this part works. The toilet trip lever—also known as the toilet handle—is the trigger to start the flushing mechanism of the commode.
In most cases, the toilet flush lever arm or the lift arm is connected to the flapper using a lift rod or chain. When you push the lever, it pulls the flapper up which lets the water out of the tank.
Although there are also toilet levers that don’t need a chain to operate, it’s still possible to encounter a toilet handle that’s loose and won’t flush.
What Damages the Toilet Trip Lever?

- Hard water. You may want to change a toilet handle that’s corroded by hard water. The latter can break the said component or get it stuck in one position, especially if made of metal.
- Poor-quality material. Toilet handles come in metal and plastic. While there are good brands for both, metal ones are more durable. Plastic is replaced more often, such as when the toilet lever arm’s broken.
- Excessive force. When pressed with too much weight or force, the handle may suffer a strain that can lead to loosening, disconnection, or breakage.
- Everything has a lifespan, including the lever. If yours is old and not working well anymore, it’s time to look up instructions on replacing the toilet handle.
Step-by-Step Process in Toilet Handle Replacement (With and Without a Chain)
What to prepare:

- toilet lever replacement kit (ensure that this matches your toilet’s lever hole size and position)
- adjustable wrench (optional when the nut or washer is too tight)
Step 1: Removing the Toilet Handle

We recommend turning off the shut-off valve and flushing the toilet to drain the tank first. This will make removing and reinstalling components easier.
1. To remove a toilet handle, unchain the lift arm to disconnect it from the flapper or cylinder.
If your flushing mechanism uses a trip lever that has no chain, the lift arm probably goes through a square hole in the flapper valve.
Lightly turn the said valve away from the arm, then slide the arm’s end out.
2. Look inside the tank and see the mounting nut securing the lever in place. Twist it clockwise by hand or with an adjustable wrench. If there’s an O-ring, remove it as well.
However, mounting nuts may vary. If yours can’t be loosened clockwise, then counterclockwise is the correct direction.
3. Pull out the broken toilet flusher handle from the tank. You will have to maneuver a little, but this is easy.
Step 2: Installing the New Toilet Handle
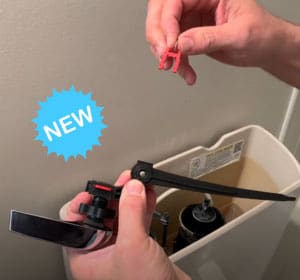
1. Take your new toilet flush handle and insert the lift arm into the hole in the tank where you removed the old handle.
2. Secure the new handle with the mounting nut or washer that comes with the replacement kit. Insert this into the lift arm and all the way to the back of the handle.
Again, mounting nuts are secured differently. You may need to twist it counterclockwise or clockwise.
3. Take the chain connected to the flapper or cylinder and chain it to the holes found at the end of the lift arm.
Leave a bit of allowance in the chain length (measure this when the flush is at rest) but don’t make it too long since it might get entangled with the other tank components.
If your toilet handle doesn’t need a lift chain, just insert the end of the lift arm inside the square hole in the flapper valve.
Step 3: Checking the Work

The last but important step to fix a broken handle on the toilet is to check if everything is working the way it should.
- If you turn off the toilet’s water supply, turn on the shut-off valve and wait for the tank to refill.
- Flush the toilet. Observe what happens from the moment you push the new handle up to when it flushes. Is the handle loose? Does the flapper close or open completely?
- Make the necessary adjustments (i.e., the mounting nut is loose, the flapper chain is too long or short, etc.).
Frequently Asked Questions (FAQs)

Is a Toilet Handle Universal?
There are toilet trip levers that are universal or created to fit most toilets. However, you must pay attention to the following:
- Is your toilet handle on the left or right?
- Is your toilet handle supposed to be in the front or side? Is it angle-mounted?
Keep this in mind to make sure you buy the correct one that fits your commode perfectly.
How Much Does It Cost to Replace a Toilet Handle?
If your toilet handle breaks, replacement kits are available at an average price of $15. Some types or brands may cost less or more.
Are All Toilet Flush Handles the Same Size?
Aside from being placed in specific positions (front, side, angle-mounted), toilet flush handles come in different sizes, shapes, and lengths.
The lever hole is usually ½ inch in diameter, but there are also toilets with a ⅜ inches lever hole.
Conclusion
One of the bathroom repairs that you should know is how to replace a toilet handle. It’s relatively easy and can be done without a plumber.
To remove the old handle, you must unchain the lift arm or remove it from the square hole located in the flapper valve. Next, unscrew the nut securing the handle in the tank. Once done, insert the new handle and lock it with the mounting nut or washer that comes in the set.
Chain the lift arm or insert it into the square hole. Lastly, check your work by doing a test flush.

I’m Paulk Webb, and I work as a writer for Saveourwaterrebates. I’m happy to put in the time and effort to conduct market research to identify the most pressing issues faced by households concerning their plumbing. Feel free to check out our guides to get the most informed recommendations for how to solve your problems.